
During the launch of your platform, you can choose to already load all users without immediately sending a welcome mail. However, a welcome mail can serve different purposes, depending on how users can log in to your platform. In this article, we explain the different scenarios.
What are the different purposes of a welcome mail?
It is essential to first distinguish between two situations:
- Your users need to log in with a Plek account. A Plek account consists of a unique combination of an email address and password, which is only used to access Plek: In this case, users need to create a password for Plek via the welcome email. As long as no password has been created, users cannot access Plek.
- Your users log in via a link with your personnel database: In most cases, the login procedure is carried out via the system in which your users are stored. Users can log in directly with the existing password used there. This is usually the same login and password that is used for logging on to the work computer. The welcome email, in this case, only functions as a notification informing users about your Plek. The welcome email also refers via a button directly to your Plek. Do you (partly) use logging in via your staff database? Always contact your account manager before sending a welcome email.
Send a welcome mail to all users.
If you want to send the generic welcome email to all users, follow these steps:
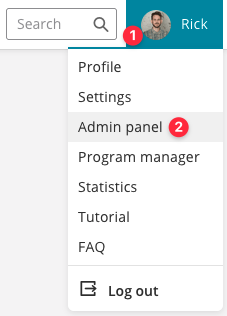
1. Hover over your name.
2. Go to the Admin Panel.
You are now directly in the Users Overview.
3. Click on Welcome Mail under User (left navigation menu).
4. If the content is correct (check with your account manager first), you can send the email.
To do so, click Send to all users.
The welcome email is now sent to all users. After receiving the email, users can create a password and log in to Plek. Then, in the Admin panel, under Status emails (in the sidebar on the left), you can see whether the emails have been sent correctly and whether they have been opened.
Send a welcome email to all users without an active account
It is also possible to send a welcome email to all users who are not yet active. In that case, choose to Send to users who have not activated their account in step 4.
Send a welcome mail to one user.
If you want to invite a user separately, you can do so in the following way:
1. Go to the admin panel (see step 1 above).
By default, you will see the overview of all users.
2. Find the user you want to invite and click on the pencil icon on the right.
This takes you to the basic information about the user in question: email address, name and rights.
3. Click on Send welcome email (at the bottom).
Only the selected user will now receive the email.
Before you invite users, try to give your site some substance: create some groups and messages. This way, you can make the new user enthusiastic about writing messages or creating groups.