
As a user on Plek, you can create an event that will show in the calendar. You can find the calendar on the right side of the dashboard or in the menu at the top of the page. Public events are visible to all users in your Plek environment. However, group events are only visible in the calendar of that specific group.
Creating an event
If you want to add an event to the agenda, follow the next steps:
Hoover with your mouse over Calendar in the menu on the top of the page.
Press Add new event.
You will be directed to a page to set up your event (see picture below)
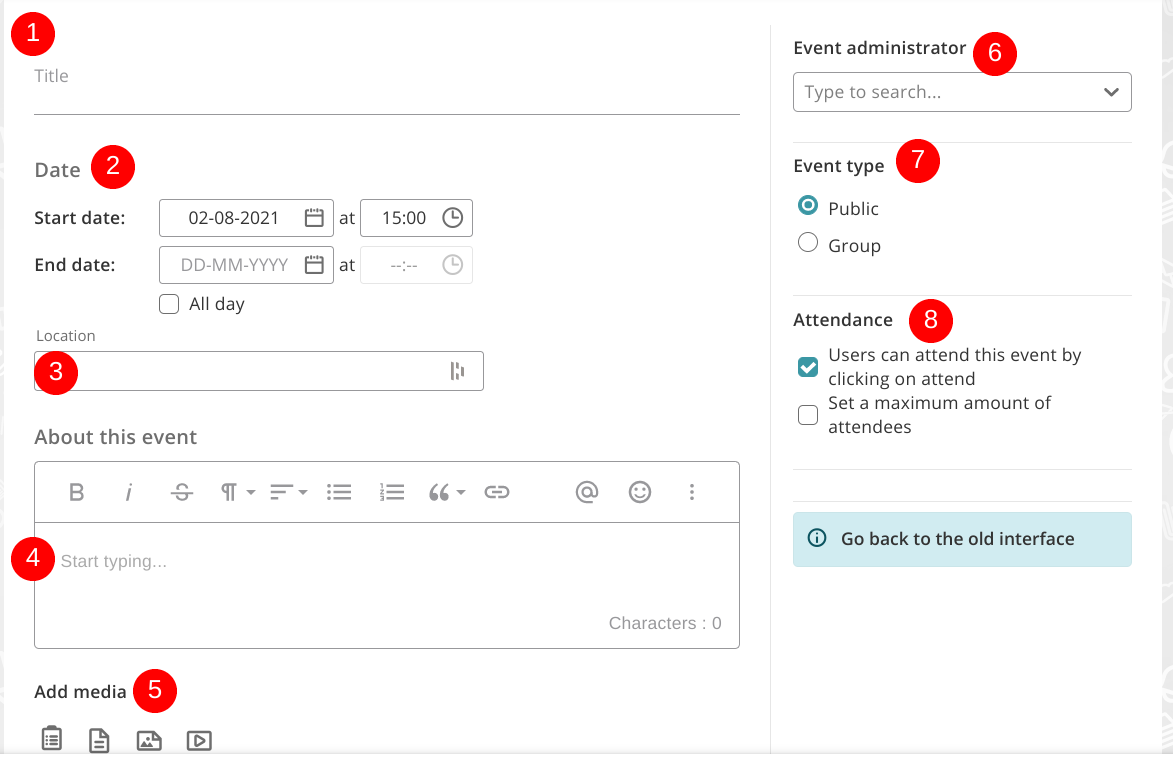
1. Add a title to your event.
2. Select a start date, possibly add an end date and a beginning and/or end time. Select 'all day' for an all-day event.
3. Choose the location. Can participants join the event online? If so, enter an online link.

4. Fill in the event details about this event.
5. Possibly add media (picture, video, document or form).
6. Select an event administrator
Side note! It is not possible to select an external user as an event administrator. However, it is possible to set two (or more) event administrators.
7. Choose if you want to share the event in public or a group.
8. Determine whether users on Plek can attend this event or a maximum number of attendees and select the option(s) that are applicable. Finally, press save.
After saving, you will see the event page of your newly created event. In the menu on the right, you will see the details of your event.
TIP!
You can also add a Plek event to your personal calendar (f.e., your Outlook agenda) with one click.
After creating an event, you can add an event banner (click on the add symbol in the top right corner).
The ideal format for an event banner is 900 x 350 pixels.