
In Plek, you can create channels. Channels are publicly accessible, but not just anyone can post there: you use channels to spread information intended for all users of your Channel. For example, company news or HR announcements.
Adding a channel
To add a channel, follow these steps:
1. First, go to the Admin area within your Channel: hover over your name in the navigation bar and click on Admin. This takes you to the Admin panel. In the sidebar on the left, you will see different items, including Channels.
2. Click on Channels. This will take you to an overview of the existing channels on your Plek.
3. Click on New channel. This will open a page where you can save the information for your new channel.
4. Name your channel and decide who can post to it. You can authorize specific persons to post in a channel or authorize a type of user. You can also combine the two (e.g. type 'content manager' plus person A and B). Besides, it is good to know that users with the admin role can post to any channel.
5. If desired, indicate what this channel is about. This gives others something to hold on to in order to determine whether the content they are going to post is suitable for the purpose of this channel:
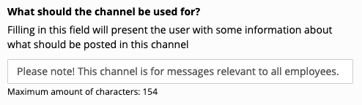
This is what it looks like:

6. When you are ready, click Create.
Tip! It is possible to load an RSS feed into a channel. The channel is then automatically filled with information from the RSS feed.