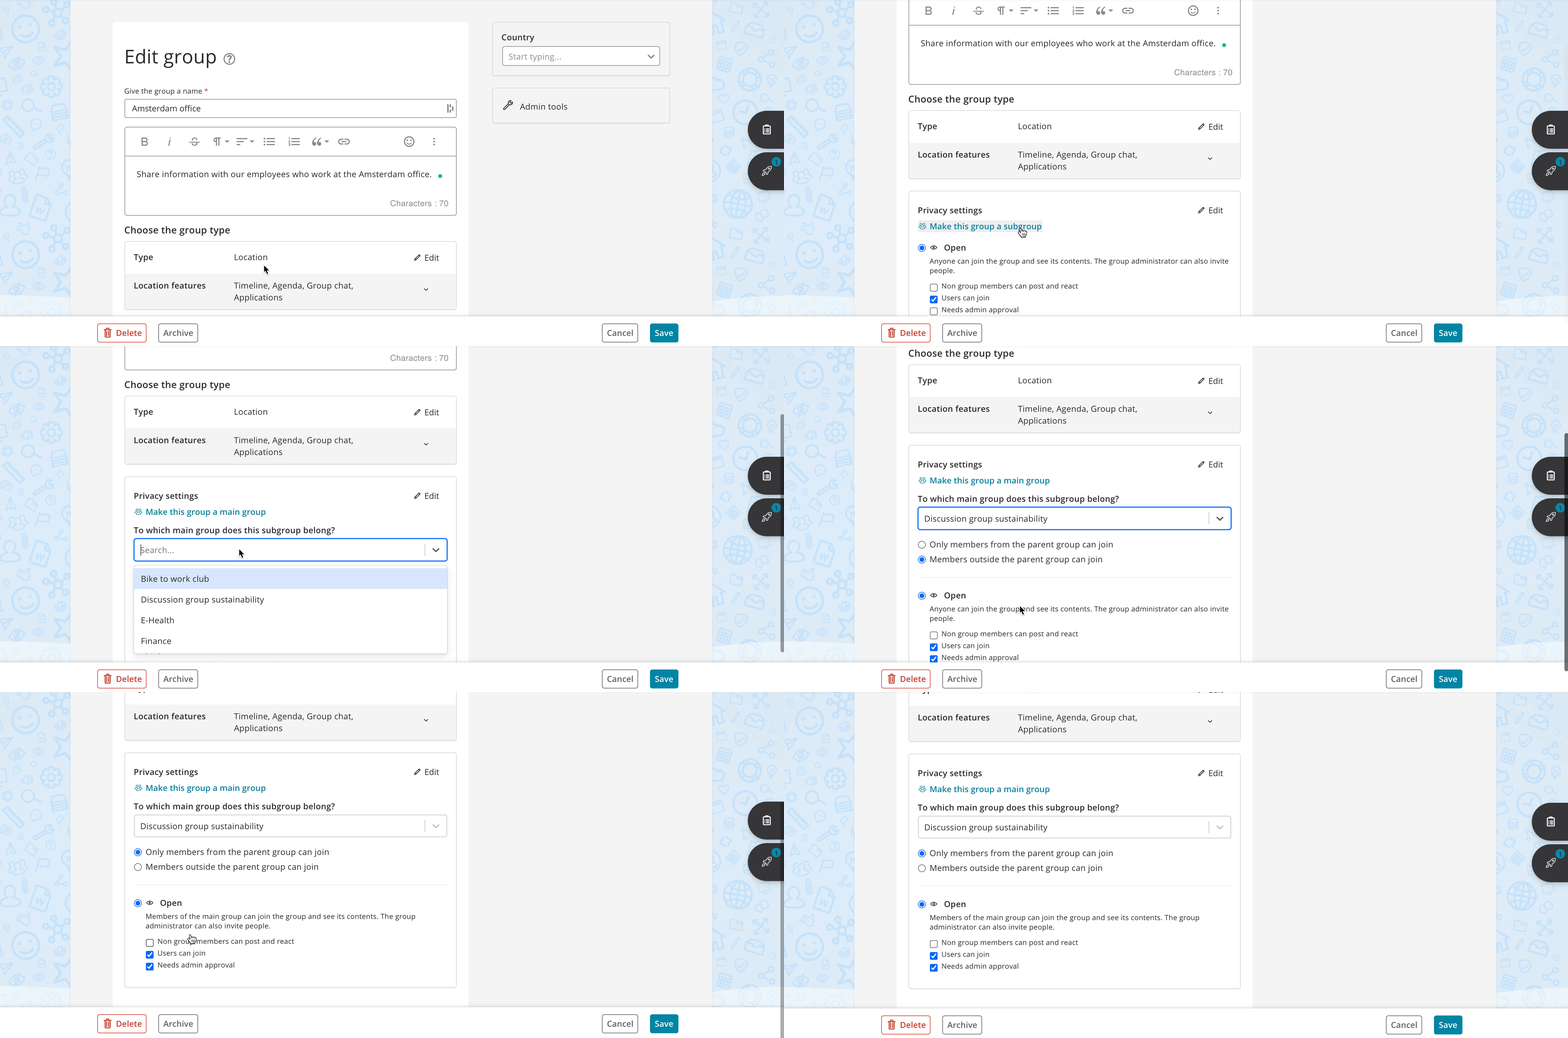
As a user of Plek, you can create your own groups and join existing groups. Sometimes groups are very large, and there are different teams or subgroups within the group. For example, think of the Communication department, which may have a team for Social Media and a team for PR. In such a case it may be useful to create subgroups within the parent group. You can only do this as a group admin.
Creating a subgroup
If you want to create a subgroup within the parent group you should take the following steps:
1. Move your mouse over Groups in the navigation bar.
2. Then click on + New group.
Fill in the fields as described in this article.
3. In the privacy settings block, click 'make this group a subgroup'.
4. A drop-down menu will appear from which you can choose the parent group. Note that as a group admin you can only choose groups that you are the administrator of. An admin can choose from all visible groups.
5. Choose who can become a member of the group.
You can choose from 'only members from the parent group' or 'members outside the parent group'. The first option is the default: the subgroup becomes part of the parent group.
The second option can be used if, for example, you want to allow a colleague from another department to contribute to a marketing campaign. This colleague does not have to be in the parent group 'Marketing' to be a member of the subgroup for the campaign in question. A subgroup that includes members from outside the parent group is not part of the parent group but is only related to the parent group.

5. Don't forget to set the privacy settings for your group: open or closed.
6. Are you ready? Then click on Create.
TIPS!
Give your subgroup a good name, so it is clear to everyone what kind of group it is and who it is meant for. For example 'team A' or 'subgroup 1' alone is not enough!
You can convert an existing (main) group into a subgroup, or vice versa. You can also link an existing subgroup to another parent group.
