Taxonomy
In Plek, just like in Google, you can find almost everything within your Plek using the search function. Sometimes, it can be useful to also use Plek's taxonomy alongside the smart search engine.
💡 What is a taxonomy?
With the taxonomy, you can assign characteristics to documents, pages, events, posts, groups, and even to your colleagues. This way, you can find everything and everyone in no time.
Setting up the taxonomy
To set up the taxonomy, follow these steps:
1. First, go to the Admin section within your Plek: hover over your own name in the navigation bar and click on Admin. You will now be directed to the Admin panel. In the sidebar on the left, you will see different sections, including the taxonomy.
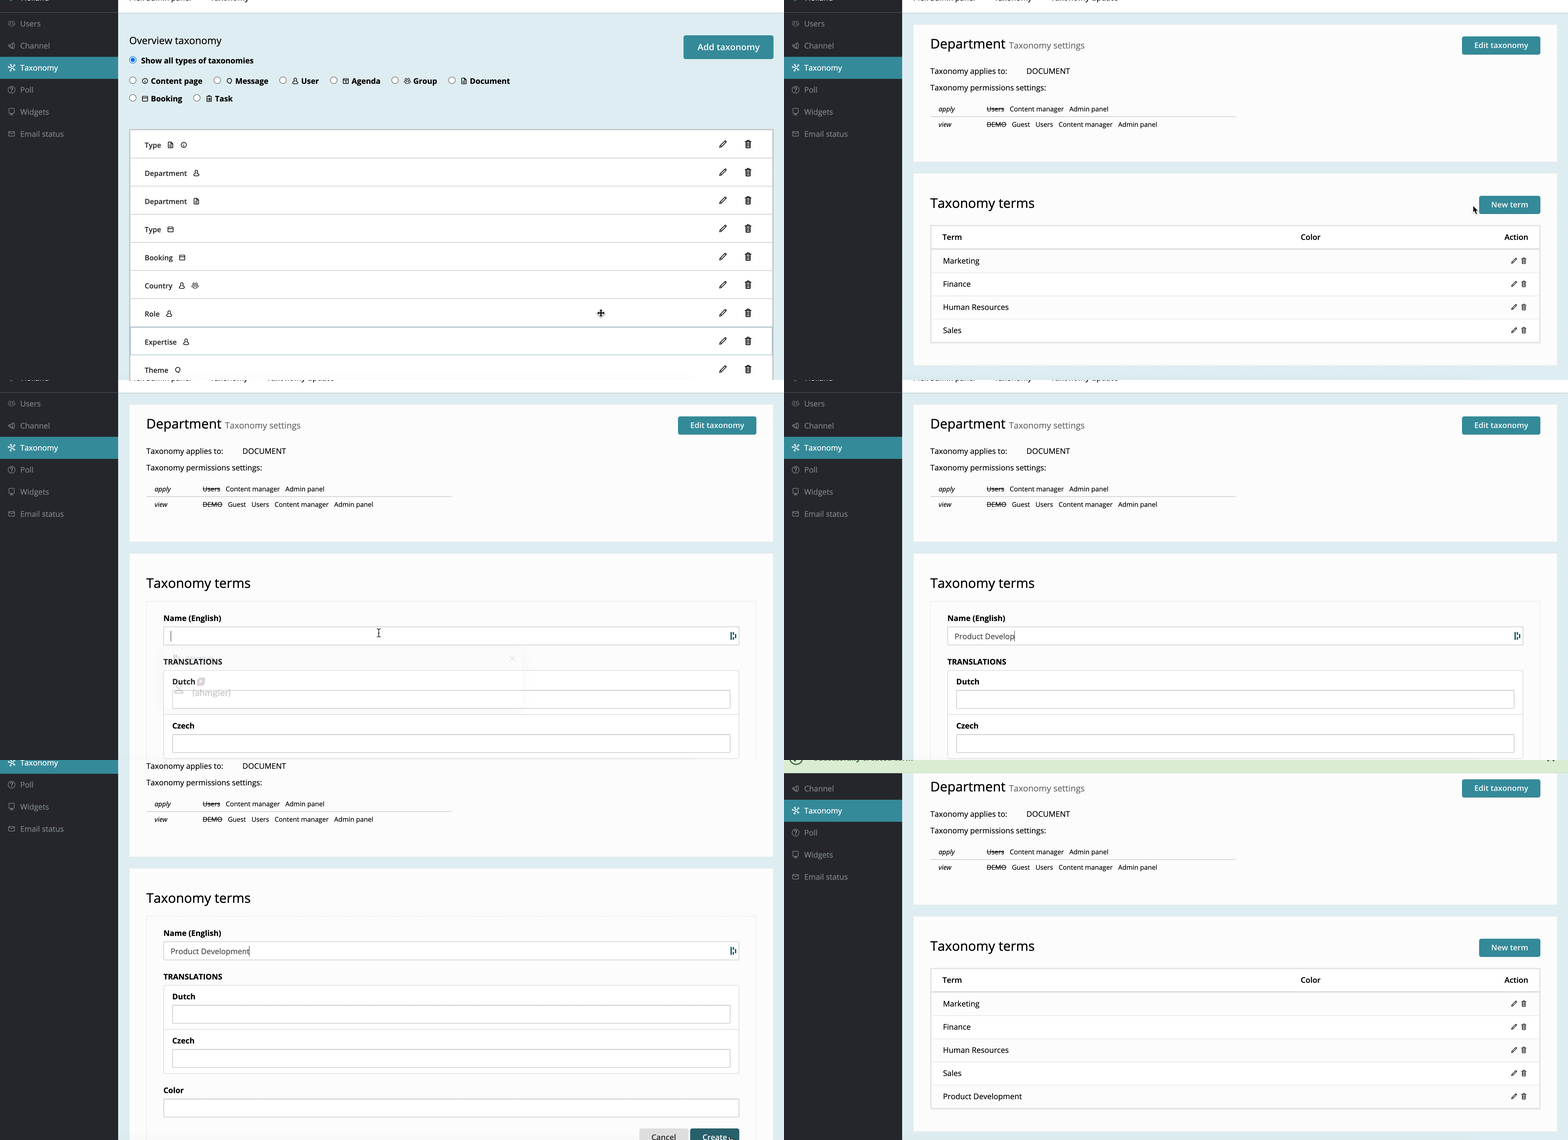
In the example below, several taxonomies have already been created.

3. Click on +New. In this window you can decide on the settings for your taxonomy.
4. Give your taxonomy a clear name that is understandable for everyone, such as 'Department'. If necessary, translations for your taxonomy can be added.
5. Next, determine which section the taxonomy belongs to. This can be multiple sections (for example, both Calendar and Document).
6. Now, define the permissions. This will set who can add terms to content and who can see and use the taxonomy to filter content.
7. Optionally, fill in a category or group under which this taxonomy falls. The taxonomy will then have a heading/title visible to other users. This is an option that helps clarify the structure of the taxonomy for others.
8. Click Create once everything is properly set. You will then return to the overview of created taxonomies. The taxonomy you just created will be listed. From this overview, you can edit and add content to existing taxonomies.
9. Click on the name of the taxonomy or on the pencil icon to the right of the taxonomy.
10. Then click on New term.
11. Enter a name.
12. Then click Save.
Your term is now saved in the taxonomy. You can add more terms by repeating steps 4, 5, and 6.
Tip! Avoid creating an extensive folder structure in Plek. Try to limit the number of terms within the taxonomy to a maximum of 10. This way, everyone can maintain an overview and easily find documents, people, and posts.
Adding terms to an existing taxonomy
To add terms to an existing taxonomy, follow these steps:
1. Go to the Admin section within your Plek: hover over your own name in the navigation bar and click on Admin.
2. Click on Taxonomy. You will now be directed to the overview of previously created taxonomies. From this overview, you can edit and add content to existing taxonomies. You can read how to create a taxonomy here.
3. Click on the name of the taxonomy or the pencil icon to the right of the taxonomy.
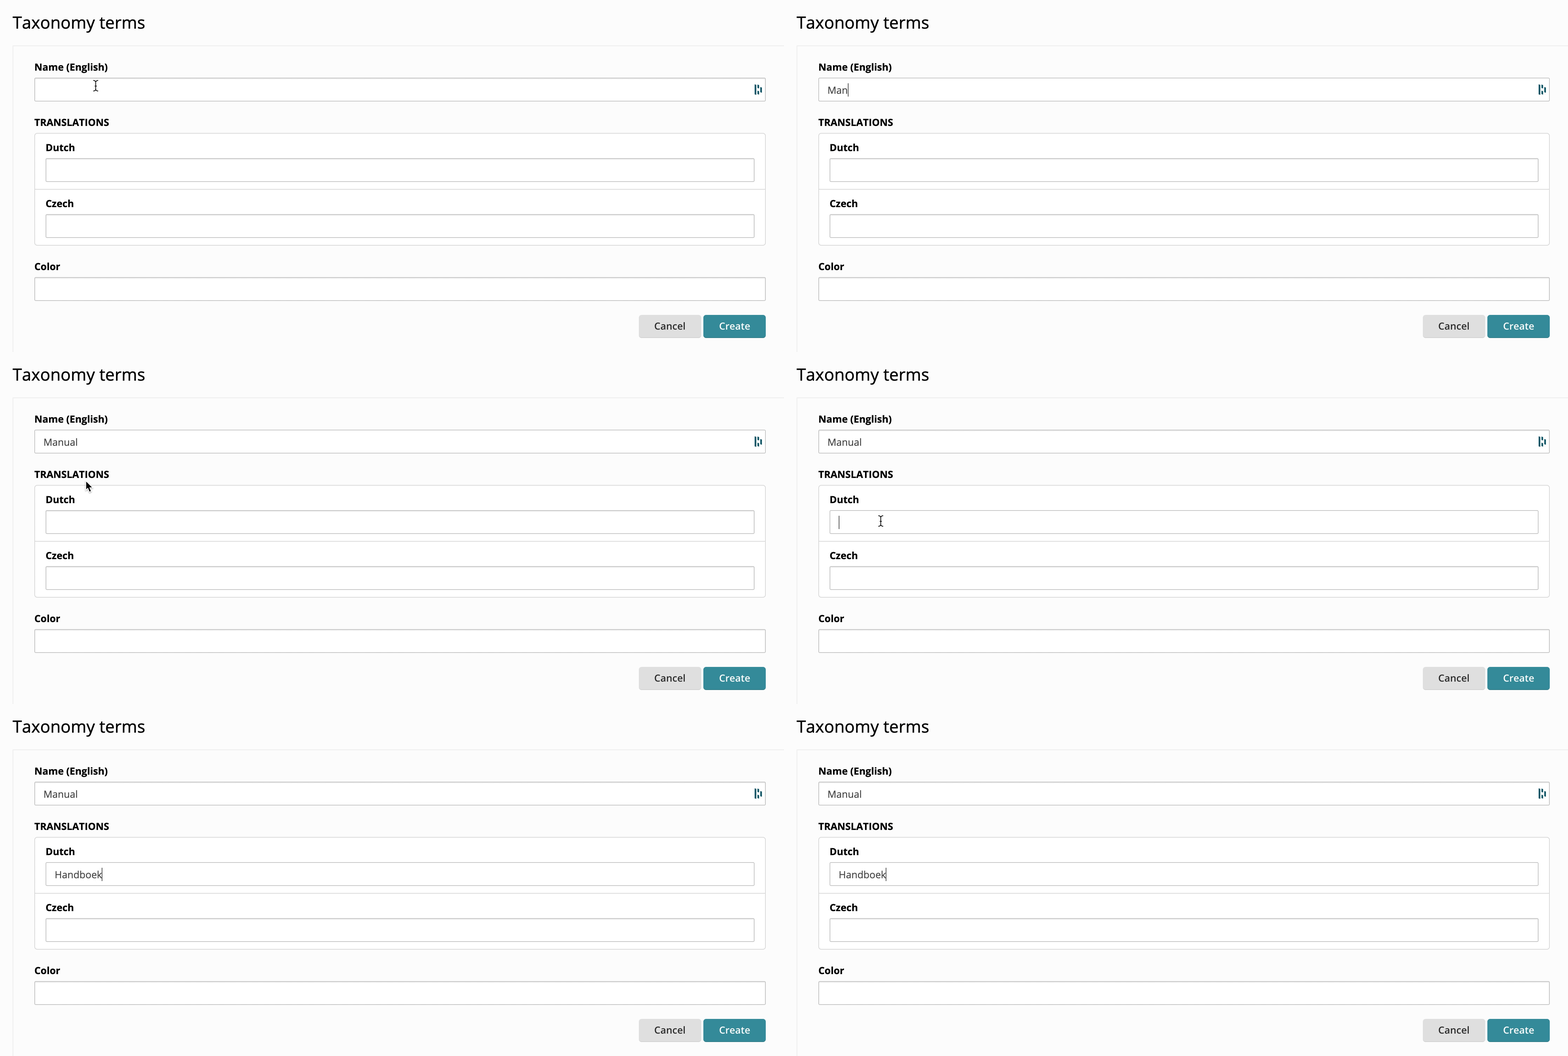
4. Then click on New term.5. Enter a name.
6. Click on Create.

Your term is now saved in the taxonomy. You can add more terms by repeating steps 4, 5, and 6.
Create multilingual taxonomy
1. Go to the admin panel. You do this by hovering your mouse over your profile at the top right of the screen. A menu will appear. Click on admin.
2. You will now be taken to the admin panel. In the left menu, click on taxonomy.
3. Click add taxonomy to create a new taxonomy.
3. If you don't know how to create a taxonomy yet, click here to go to the help article that explains step-by-step what taxonomy is and how to create a taxonomy.
4. Enter the title of the taxonomy.
5. Below the title field, fill in the translations of this title. In the example below, this is done for English and Dutch. These field appear automatically, since your Plek account manager has set your Plek platform in multiple languages.

6. Have you entered the correct translations and settings? Then click on create.
7. As you may know, after you create the taxonomy, you also add terms to the taxonomy. These are search filters. You can read how to do that in this article (steps 9 to 12). When you create a new term you will automatically see multiple language fields appear for the languages available on your platform. Fill in the translations for each term and save by clicking create.

Filtering documents with taxonomy
To search documents with the help of taxonomy, you have to take the following steps:
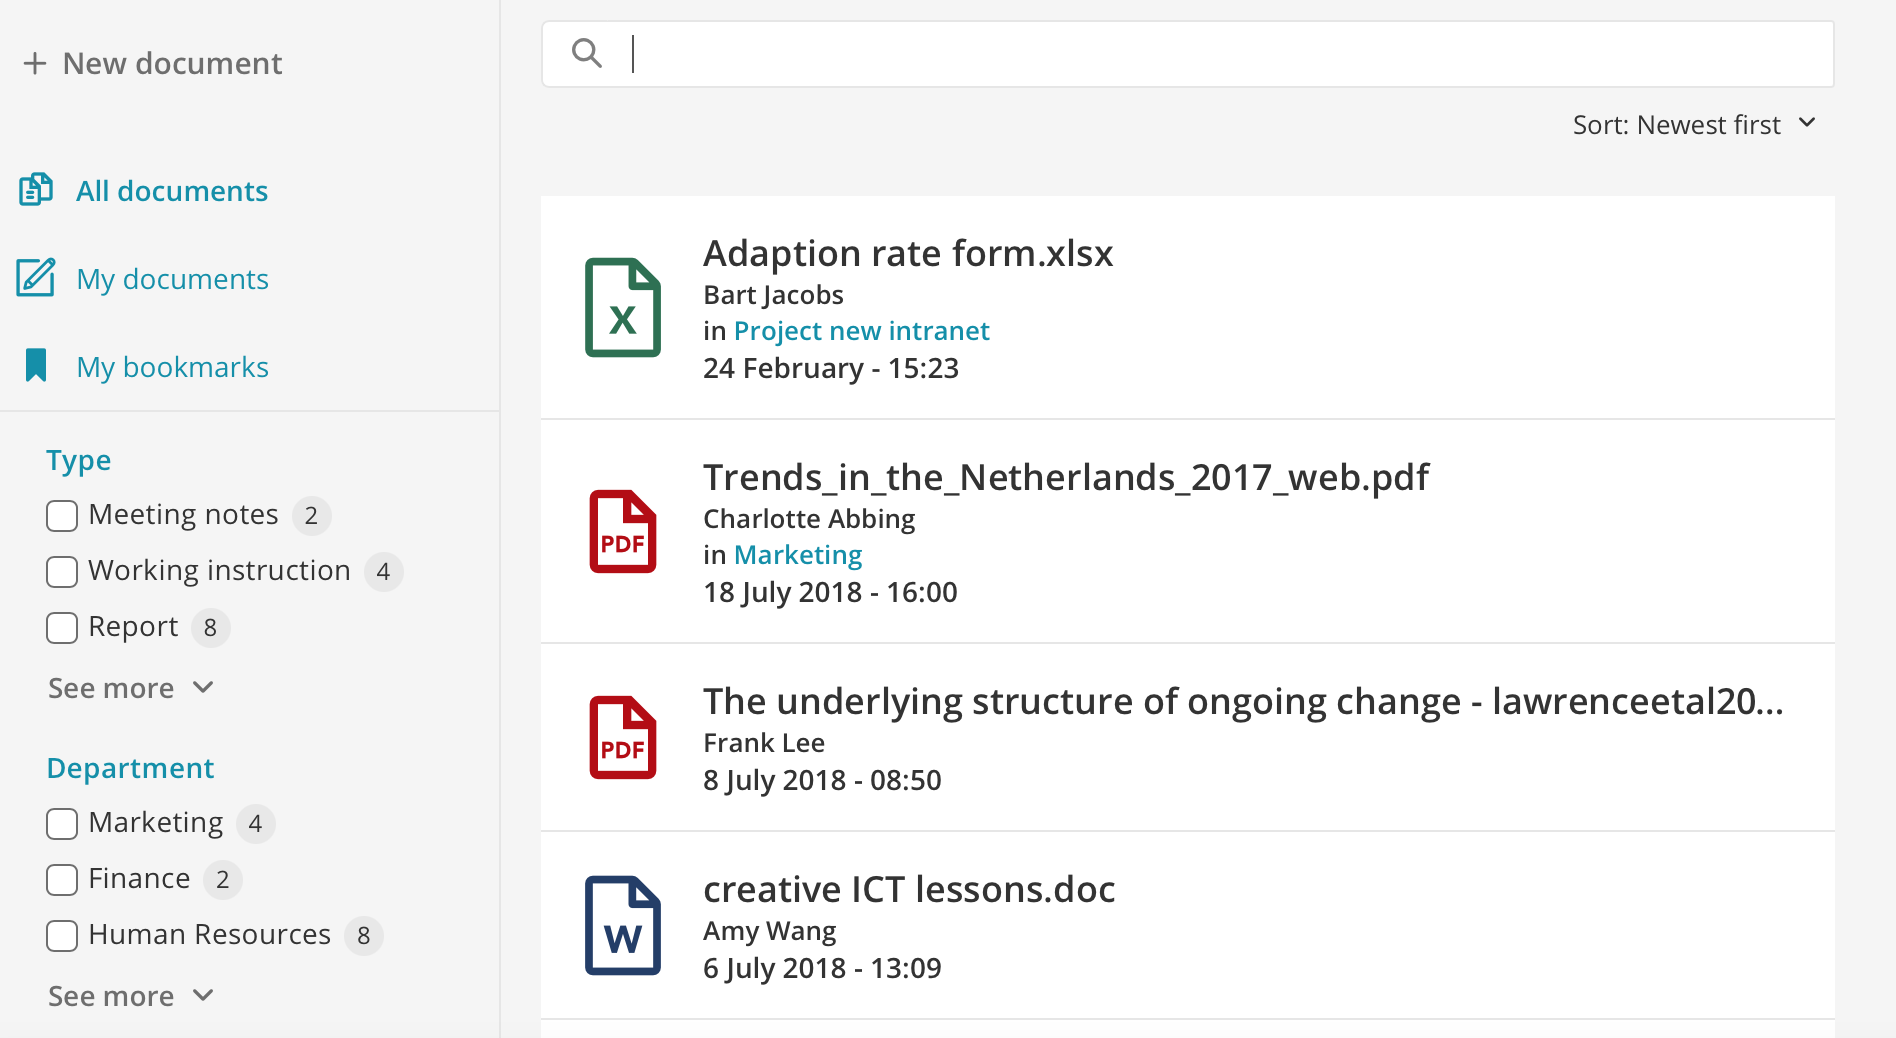
1. Click on Documents in the navigation balk.On the left side, the taxonomy is listed. The admin of your Plek has set this in a certain way so it is easier for you to find documents. In our example, there are three filters: Document Type, Department, and Theme.
2. Click on one of the filters.The taxonomy under the filter folds out. In our example, under the Department filter, the characteristic Human Resources and Sales are folded out.
3. Click on one of the characteristics.In our example, we select Human Resources. On the left side, you will see that this characteristic is selected by a little cross. On the right side, you see the documents which possess this characteristic. Sometimes it is possible to further filter your documents.
4. Then, click on another filter.In our example, we select Document Type, which has the characteristics Manual, Guide, and Protocol.
5. Click on one of the characteristics.Now you see on the left side that two different characteristics are selected. Only the documents which possess both these characteristics are being shown on the right side.
To remove a characteristic click on the cross at the right side of a characteristic. It is also possible to further filter for characteristics (depending on the size of your taxonomy).

Not sure you have found the right document? Before downloading a document, click on the little eye for a preview of it. The first pages of the document, tags and other additional information of this document are then shown.
